Step 3: Create Media Prompts
Media prompts are used to provide an audio message to callers, present them with a request or option as with an Interactive Voice Response (IVR) message, or to play music while in a queue or on hold. Media prompts can be from an audio file saved at a URL address, or from a Text-to-Speech (TTS) item where you can type out the desired message and the application will convert to a voice message.
| Your tenant has been pre-populated with media files that we will use later in this exercise to provide you with a full user experience. The media files that you are creating here are for hands on experience only. |
Create a Text-to-Speech Prompt
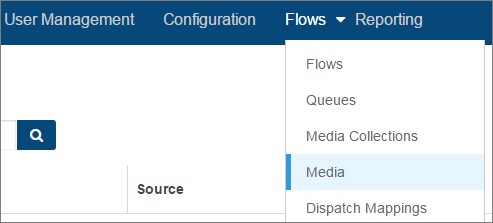
Go to Flows > Media to get to the Media Management window. Existing media prompts will be listed.

- Click Create in the top right corner to open the Creating New Media panel.
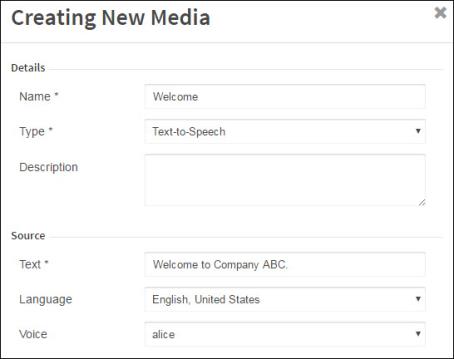
- Enter a Name for this media item.
This is a free form entry field. Use any media name that does not already exist and would apply for your business, such as Thanks for Calling, IVR Menu Option A, Customer Satisfaction Survey. - Select the Type of TTS
- In the Source field, enter what you would like to be said, such as Welcome to Company ABC.

- Click Submit at the bottom of the panel to save the new media prompt.
Create an Audio Prompt from a Media File
Go to Flows > Media to get to the Media Management window. Existing media will be listed.
- Click Create in the top right corner to open the Creating New Media panel.
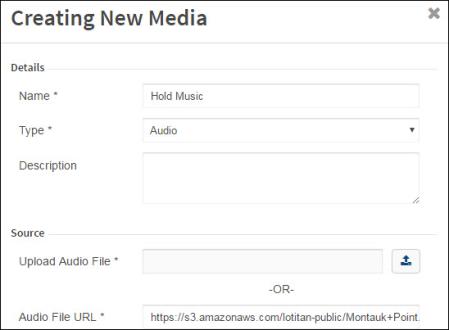
- Enter a Name.
This is free form entry. Use any media name that doesn't already exist and applies for your business, such as Hold Music - Tune, Company Jingle, Selection Confirmation Sound. - Select the Type of Audio.
- In the Source field, enter the link for the audio such as https://s3.amazonaws.com/lotitan-public/Montauk+Point.mp3
You are welcome to use the URL above for your audio prompt, or any other audio file on a publicly accessible URL.
- Click Submit at the bottom of the panel to save the new media prompt.
Watch the CxEngageTraining video to see this in action:
Next Section:
Step 4: Create a Disposition List

