About Formulas in Historical Reporting
Use the Formula tab in Analysis to create custom formulas for use in tables, charts, and crosstabs. For example, you can calculate a new value based on other columns or format the values of a specific column. The formula section uses SQL. Write the SQL query from scratch or use the Insert a Column, Formula, and Operator drop-down menus to create the query. We recommend using the Insert a Column drop-down menu to ensure that your formula uses the correct syntax for the column name.
| Creating formula columns requires knowledge of writing SQL-based queries. |
| Object | Description | |||
|---|---|---|---|---|
| 1 | Formula (tab) | Click the Formula tab to begin creating a new column from a formula. | ||
| 2 |
Name
Required |
Enter the name for the formula column you are creating. | ||
| 3 | Formula (text box) Required |
Enter the formula in SQL. Optionally, use the Insert a Column, Formula, and Operator drop-down menus for the components of the formula.
|
||
| 4 |
Insert a Column
Optional |
Click the drop-down menu and select the column you want to use in the formula. We recommend using this drop-down menu to enter the column name so that the name is entered in the proper syntax. | ||
| 5 |
Formula (drop-down menu)
Optional |
Select from the available formulas. For example, you can use the Extract (HOUR FROM date) Formula to extract the hour to analyze and view your data in one hour intervals. In this example, we used the Start Time to extract the hour and group the data in one-hour intervals to see how agents are performing in that time frame.
|
||
| 6 |
Operator
Optional |
Select from the list of available operators to use in the formula. | ||
| 7 |
Data Type
Required |
Select the data type from the drop-down menu. The default data type is Number. | ||
| 8 |
Display format
Optional |
Select a display format from the drop-down menu. By default, no display format is selected. | ||
| 9 | Add | Click to Add the formula column to the table. |
| If you add a formula column and then try to change the data set, an error message is presented. If you need to change the data set, remove the formula column first. |
In this example, we are using the Interaction Summary data set. We want to add together two of the columns that we've selected in the data set: IVR Abandons and Queue Abandons.
- Name: Abandons Example Column
- Formula:
- From the Insert a Column drop-down menu, select IVR Abandons.
- From the Operator drop-down menu, select +.
- From the Insert a Column drop-down menu, select Queue Abandons.
The formula is displayed in the Formula text box as follows:
[Interaction_Summary.IVR Abandons]+[Interaction_Summary.Queue Abandons] - Data Type: Select Number.
- Display Format: Leave blank.
- Click Add.
The new column is added at the end of the table.
Identifying Formula Columns in a Table
Default columns are highlighted in blue at the top. Formula columns are not highlighted with blue at the top.
Local Filtering for Formula Columns
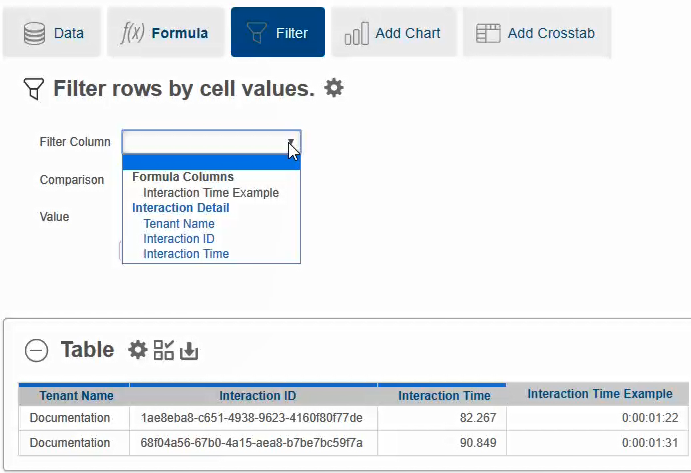
After you add a column using a formula, you can use it in a local filter. When you select a column in the Filter Column drop-down menu, the new column is listed under Formula Columns. The columns selected in data set are listed in the Filter Column drop-down menu under the data set name.
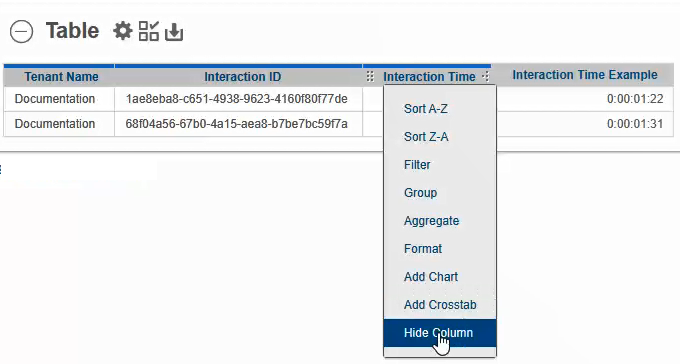
If you hide a column in the table, it still shows in the Filter Column drop-down allowing you to filter by that column.


