Flow Tutorial: Design a Flow for SMS Interactions
This tutorial guides you through creating a basic SMS interaction flow design using the configuration console. This flow includes sections for both the customer and an agent resource. After completing this tutorial, you will:
- Understand the core elements of an SMS flow
- Be able to link those elements together to build a flow that routes SMS messages to an agent
- Know how to configure the options for those elements
You will create a flow that:
- Receives SMS messages from a customer
- Places the messaging customer into a queue for an agent
- Sends the SMS work offer to an agent logged into the Agent Toolbar
- Allows the agent to respond to the SMS message from the Agent Toolbar
- Places the agent in Ready status when the interaction is complete
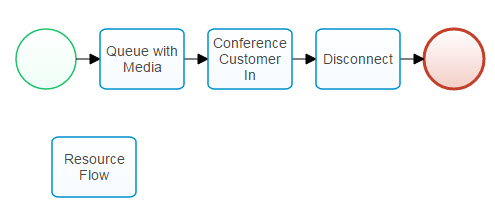
Here is what the completed flow will look like:
Prerequisites
Before you begin, you need:
- An SMS-enabled telephone number that is routed to the correct gateway URL in order to receive or send SMS messages.
If you do not currently have an SMS-configured telephone number, contact Enghouse Interactive Support.
You can create the flow for this tutorial without an SMS-enabled telephone number, but will be unable to test it by sending or receiving messages. - A media file in your tenant.
The Queue Interaction activities require a media prompt in order to publish the flow. With an SMS interaction the media file is not actually played to the customer. Any media file on the tenant is sufficient. - At least one queue enabled in your tenant for the SMS message to route to.
Create the Flow
To create the SMS interaction flow:
- Go to Flow > Flows.
- Click Create.
- Enter a name for your flow. For example, "Support SMS Flow".
- Select Customer as the Type.
- Click Submit.
Design the Flow
| Step | Details | Element | ||
|---|---|---|---|---|
| Step 1 | Drag and drop an Entry event onto the Flow Designer canvas. |

|
||
| Step 2 |
Next to the Entry event, add a Queue with Media activity.
Connect the Entry event to the Queue with Media activity. |

|
||
| Step 3 | Next to the Queue with Media activity, add a Conference Customer In activity and connect the Queue with Media activity to it. |

|
||
| Step 4 |
Next to the Conference Customer In activity, add a Disconnect activity and connect Conference Customer In to it.
|
|||
| Step 5 |
Next to the Disconnect activity, add an Exit event and connect the Disconnect activity to it.
|

|
||
|
Checkpoint: Your flow should now look similar to this example.
|
||||
| Step 6 |
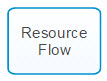
Below the Entry event from Step 1, add a Resource Flow activity.
|
|
||
| Step 7 |
Click the gear icon on the canvas to access the flow settings and select the Flow Defaults tab. Enter any settings that you want for this flow. |

|
||
| Step 10 |
Publish the flow.
|
|
||


Create your SMS Dispatch Mapping
Now that you have an SMS-enabled number, and a flow that routes SMS messages, you need to map your SMS-enabled number to the designated flow.
To create your SMS Dispatch Mapping through the configuration UI:
- Go to Flows > Dispatch Mapping
- Click Create.
- Enter a Name.
This is a free form entry. Use any Dispatch Mapping name that doesn't already exist and would apply for your business, such as Support - SMS. - Optionally, enter a brief Description for this mapping.
- Select an Interaction Type of SMS.
- Select a Mapping of contact-point.
- Enter the telephone number, in E.164 format, that is being set up to receive SMS messages.
- Select the flow that was created in the previous section from the Dispatch to flow menu.
- Click Submit.
Putting It All Together
You can test your new flow by logging in to the Agent Toolbar or , sending a message to your SMS-enabled number that was just mapped to your SMS flow, and responding to the message.
