Queue Query Tutorial
This tutorial guides you through building a basic queue query that contains escalation queries using the Basic Query Builder in CxEngage. After completing this tutorial, you will know how to:
- Use the basic query builder
- Add filters to queries
- Set the amount of time that passes before an escalation query begins
- Add multiple levels to escalation queries
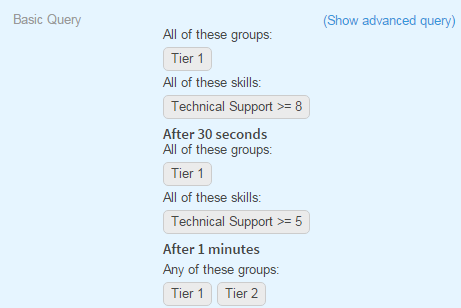
You will create a queue query that will:
- Route calls to resources that are part of the Tier 1 group with a Technical Support skill proficiency of at least 8
- Broaden after a caller waits unanswered in the queue for 30 seconds to search for resources that are part of the Tier 1 group with a Technical Support skill proficiency of at least 5
- Broaden after a caller waits unanswered in the queue for one minute to search for a resource that is either part of the Tier 1 group or the Tier 2 group.
Here's what the completed queue query will look like:
Prerequisites
This tutorial assumes that your tenant has the following skills and groups. If your tenant doesn't include these skills and groups, you can substitute them with those that apply to your tenant.
- A skill called "Technical Support" that has proficiency enabled
- A group called "Tier 1"
- A group called "Tier 2"
Creating a Queue
To begin, create a new queue in your tenant:
- Go to Flows > Queues.
- Click Create.
- Add a Name and Description.
- Ensure that you are in the basic queue query builder view. If you see Show advanced query, you are in the basic view.

If you are in the advanced view, click Show basic query to return to the basic query builder.
Part 1: Creating a queue query using the Basic Query Builder
In the first part of this tutorial, we'll create a queue query that searches for an available resource that is both a member of the Tier 1 group and also has a Technical Support skill proficiency of 8 or higher.
| Step | Instructions | |
|---|---|---|
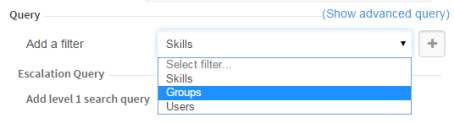
| 1 | Under Query, select Group from the Add a filter drop-down menu. |
|
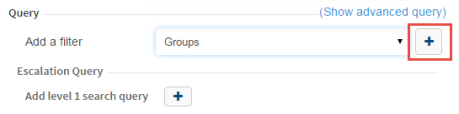
| 2 | Click the plus sign ( ) to add the filter. ) to add the filter. |
|
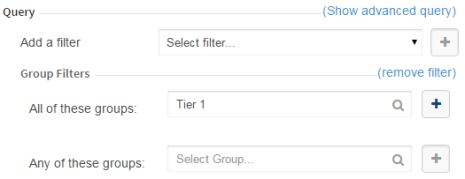
| 3 | In All of these groups under Group Filters, select Tier 1. |
|
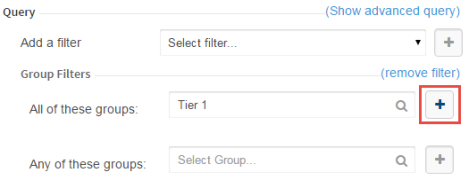
| 4 | Click the plus sign () next to the group you selected. |
|
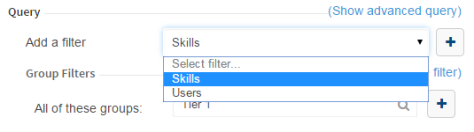
| 5 | Under Query, select Skill from the Add a filter drop-down menu. |
|
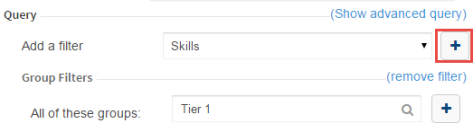
| 6 | Click the plus sign () to add the filter. |
|
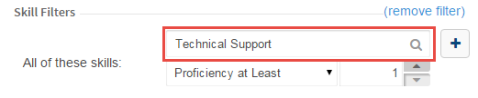
| 7 | In All of these skills under Skill Filters, select Technical Support. |
|
| 8 | Under the skill, select Proficiency at Least. |

|
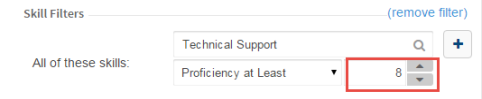
| 9 | For the number value, enter 8. |
|
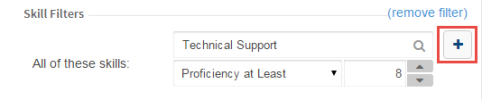
| 10 | Click the plus sign () to add the skill. |
|
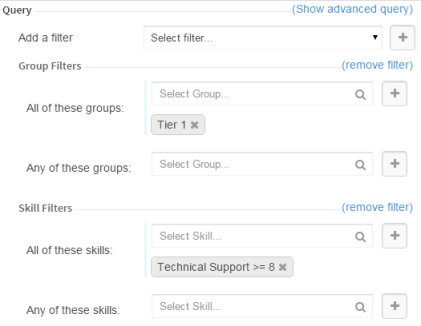
| Checkpoint: Your query should currently look like this: |
|
|
Part 2: Create a First Level Escalation Query
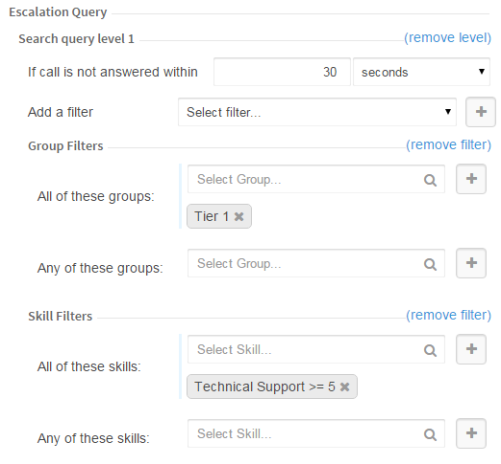
In this section, we'll create an escalation query that broadens the queue query after a caller waits unanswered in the queue. We'll make the query less restrictive by lowering the skill proficiency requirements when the caller waits in the queue for 30 seconds. After 30 seconds, the query will search for an available resource that is part of the Tier 1 group and also has a skill proficiency of at least 5 for the Technical Support skill. Because we are lowering the skill proficiency requirement from 8 to 5, more resources are eligible to handle the call to ensure that it is answered more quickly.
| Step | Instructions | |
|---|---|---|
| 1 | Under Escalation Query, click the plus sign () next to Add level 1 search query. |

|
| 2 | In If a call is not answered within add 30 as the time value. |
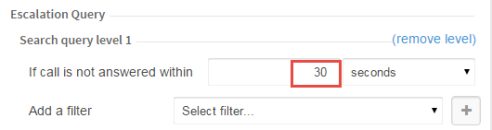
|
| 3 | In If a call is not answered within select seconds as the unit of time. |
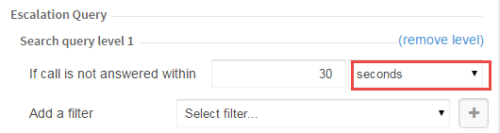
|
| 4 | In Add a filter, select Groups. |
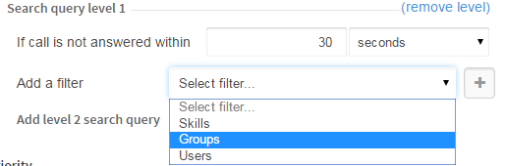
|
| 5 | Click the plus sign () to add the group. |
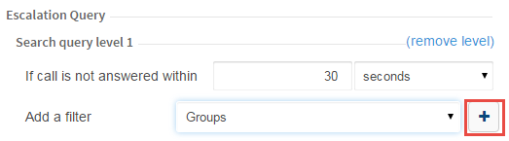
|
| 6 | In All of these groups, select Tier 1. |
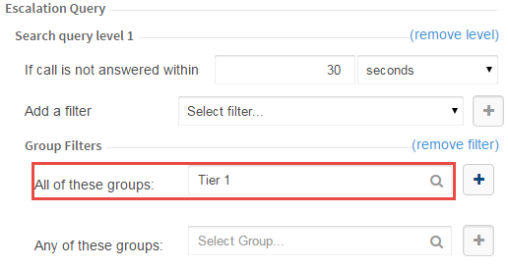
|
| 7 | Click the plus sign () to add the Tier 1 group. |
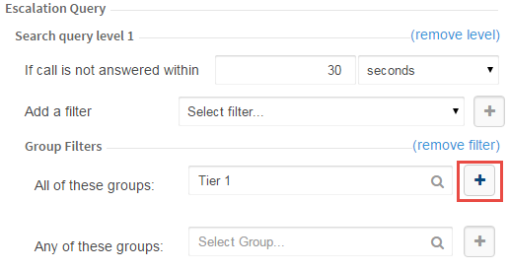
|
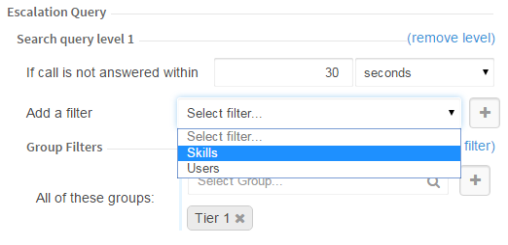
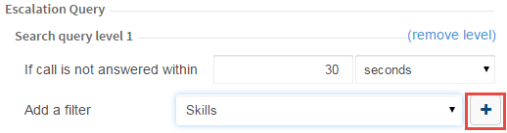
| 8 | In Add a filter, select Skills. |
|
| 9 | Click the plus sign () to add the skill filter. |
|
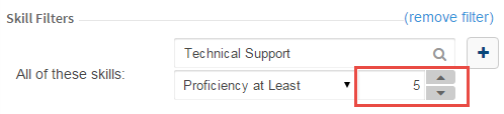
| 10 | In All of these skills, select Technical Support. |

|
| 11 | Under the skill, select Proficiency at Least. |

|
| 12 | For the proficiency level, enter 5. |
|
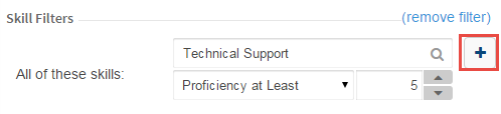
| 13 | Click the plus sign to add the skill and proficiency. |
|
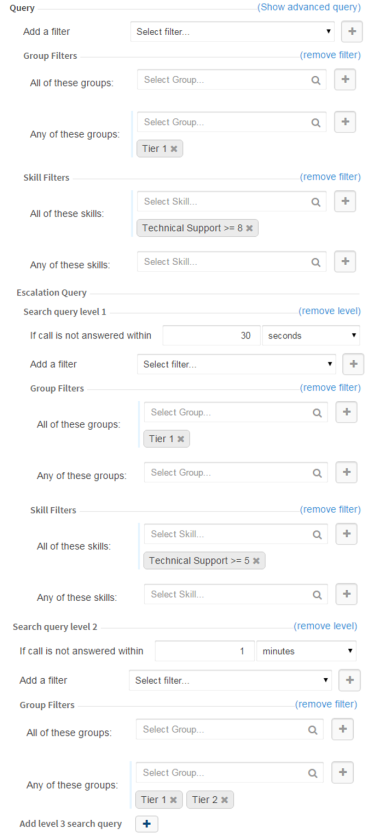
| Checkpoint: Your first level escalation query should look like this: |
|
|
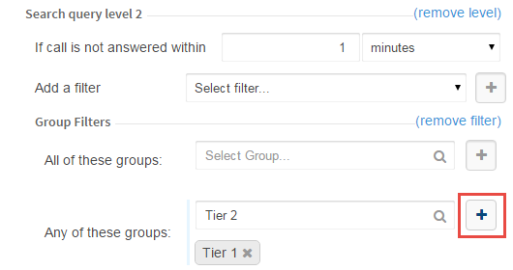
Part 3: Create a Second Level Escalation Query
In this last section, we'll create a second level escalation query to broaden the queue query further when a caller waits unanswered in the queue for one minute. Here, we will no longer require that a resource has the Technical Support skill. Instead, we'll broaden the query so that it searches for any resource that is either a member of the Tier 1 group or the Tier 2 group. Because more resources are eligible to handle the call, the caller won't have to wait as long in the queue.
| Step | Instructions | |
|---|---|---|
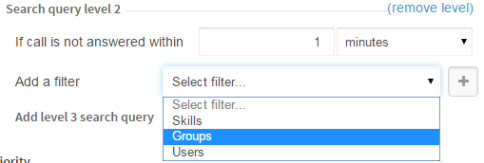
| 1 | Click the plus sign () next to Add level 2 search query. |

|
| 2 |
In If a call is not answered within add 1 as the time value. Note: You will receive the message "Time in queue must be greater than the previous value" because the time entered for each escalation query must be greater than the previous escalation query. This message will go away when you select the unit of time in the next step. |

|
| 3 | In If a call is not answered within select minutes as the unit of time. |

|
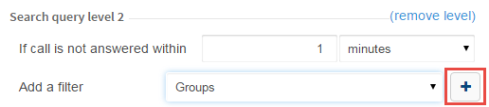
| 4 | In Add a filter, select Groups. |
|
| 5 | Click the plus sign () to add the group filter. |
|
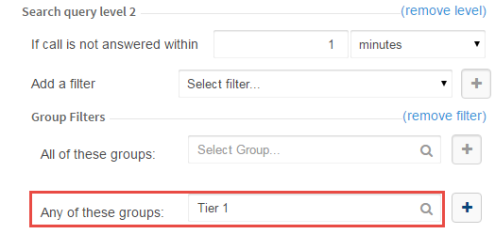
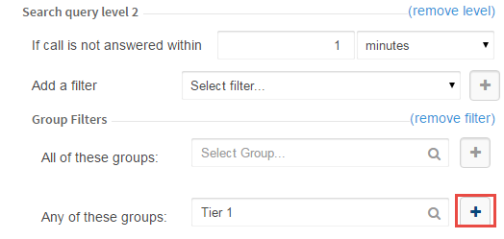
| 6 | In Any of these groups under Group Filters, select Tier 1. |
|
| 7 | Click the plus sign () to add the group. |
|
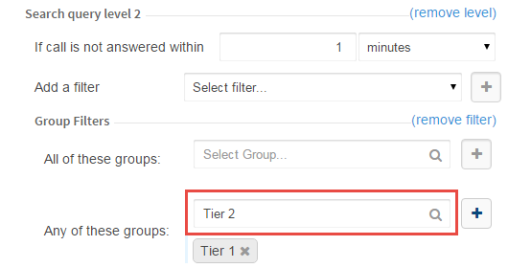
| 8 | In Any of these groups under Group Filters, select Tier 2. |
|
| 9 | Click the plus sign () to add the group. |
|
| Checkpoint: Your second level escalation query should look like this: |

|
|
Completing Your Queue
Congratulations! You've built a queue query that includes escalation queries. This completes the tutorial for creating a query for your queue. You're ready to fill out your queue's priority values and then click Submit to save your queue configuration.