Step 1: Create and Modify User Skills, Groups, and Profiles
Administrators can define skills and groups to aggregate agents that have specialized skills or knowledge. You can easily edit user profiles by modifying skills, proficiency, and group membership directly from the configuration console. In this section, you will create groups; create skills; and assign users to the groups and skills.
Create Groups
Go to User Management > Groups to get to the Group Management window. Existing groups will be displayed in a list.
- Click Create, located on the top right corner to open a panel on the right side of the window.

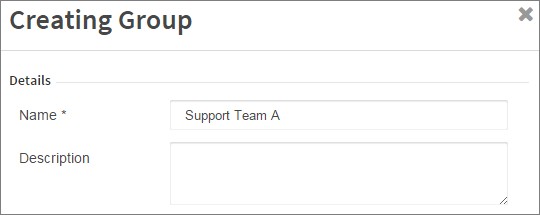
- Enter a group Name.
This is free form entry. Use any group name that does not already exist and would apply for your business, such as Support Team A, New Acquisitions, Escalations Team.
- Optionally, you can enter a brief description of the group.
- Click Submit at the bottom of the screen.
- Repeat steps 1 - 4 to create any additional groups.
Create Skills
Go to User Management > Skills to get to the Skill Management window. Existing skills will be listed.
- Click Create, located on the top right corner to open the Creating a Skill panel.
- Enter a skill Name.
This is free form entry. Use any skill name that doesn't already exist and would apply for your business, such as Support, Spanish Speaking, Typing Skills. - Optionally, you can click to enable Has Proficiency
Skill proficiency allows for assigned users to be assigned users a rating for their proficiency level with this skill, which can be used for scenarios where a specified proficiency level is required for flow activity. The proficiency value options are from 1 (lowest) to 100 (highest), however some skills or scenarios may use different range options such as 1 to 5, 1 to 10, etc. Specific proficiency levels are assigned at the user level. - Click Submit at the bottom of the panel.
Edit User Profile
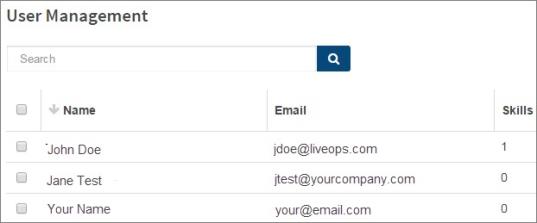
Go to User Management > Users to get to the User Management window.
Existing users will be listed.

Click on your user to open the User Panel.
Assign Skill to User
- In the User Panel, locate the Skills heading and click inside of the "Add Skills..." text box.

- Select an existing skill from the list, such as Support, or enter the name of a new skill, such as Service.
If proficiency is enabled for this skill, adjust the proficiency level for this user by entering a value or using the directional arrows. Skipping the proficiency setting will result in a default proficiency value of 1 being added.
- Click on the plus sign ("+") to add the skill to the user.
| New skills can also be created here instead of through the Skills Management window, with proficiency levels assigned. |
Editing User Skills
You may want to edit a skill after having added it to a user's profile. For example, forgetting to add a proficiency level when adding a skill. Follow the steps below to edit an assigned skill.
- In the User Panel, click on the "x" to the right of the assigned skill to delete the skill from the user's profile.
- Assign the skill to the user with the appropriate values.
Assign Group to User
- In the User Panel, locate the Groups heading and click in the "Add Group..." text box.
- Select an existing group from the list, such as Support Group A, or enter the name of a new group, such as Service.
- Click on the plus sign ("+") to add the user to this group.
The Submit button is not required to save changes to user skills and groups, which are saved when added.
| If this user is going to be used as an agent logging in to receive a call at the end of this activity, you should assign the pre-existing Sales and Support groups to the user. We will be designing a call flow that uses these groups. |
Watch the CxEngageTraining video to see this in action:

