Step 2: Create Queues
Go to Flows > Queues to open the Queue Management window. Existing queues will be listed.
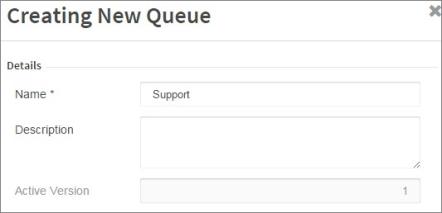
- Click on Create in the top right corner to open the Creating New Queue panel.
- Enter a Name for the queue.
This is free form entry. Use any queue name that does not already exist and would apply for your business, such as Technical Support, Reservations, New Orders. - Optionally, enter a short description for the queue.

- Leave the Query and Priority sections empty, they will save with the default values necessary for this activity.
- Click Submit to save the queue in a disabled status.
- Click the status indicator toggle by the new queue name to enable it.
Status indicators are gray to indicate disabled, and green to indicate active or enabled.
Watch the CxEngageTraining video to see this in action:

