Navigating Email Interactions
You can review and reply to incoming emails in Skylight Desktop. Email interactions are indicated with an envelope icon in the interactions management panel. If your tenant uses capacity rules, you can receive email interactions if Email is included in the rule assigned to your user profile.
Reviewing Incoming Emails
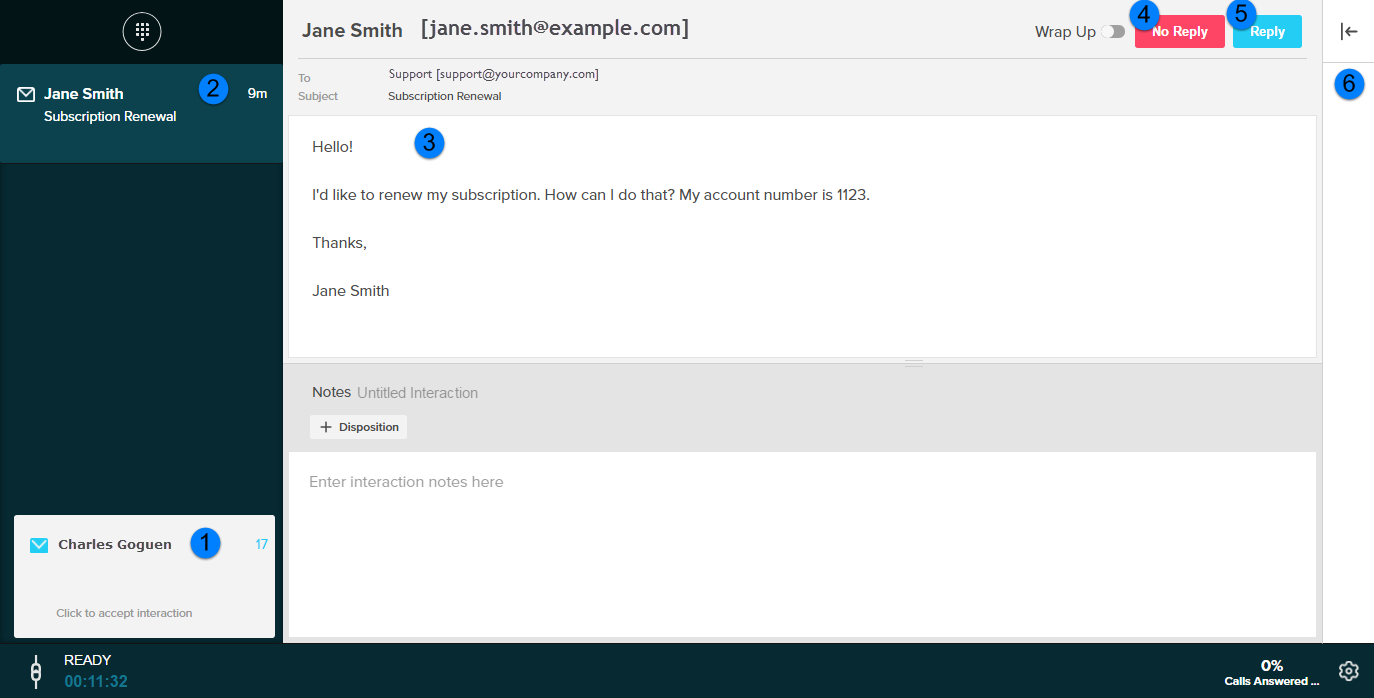
When you accept an email work offer, you can review the email before you click Reply to compose and send a response.
| Object | Description | |
|---|---|---|
| 1 | Email Work Offer | The incoming messaging work offer notification. Click the toaster notification to accept the interaction. |
| 2 | Active Interactions | Lists all active interactions. Click the interaction to view the conversation. Email interactions are indicated by an envelope icon ( ). ). |
| 3 | Incoming Email |
The body of the incoming email. You can review the email's contents including the email address that it was sent to, the subject, message, and attachments. Inline images are also added as attachments to the email. Click an attachment to download and open it. |
| 4 | No Reply |
Click No Reply when the incoming email doesn't require a response. If Wrap Up isn't enabled, the email closes and the interaction ends. If Wrap Up is enabled, you go into the Wrap Up phase. During this time, you can complete any post-interaction work such as adding disposition codes or notes. When Wrap Up ends, the email closes and the interaction ends. |
| 5 | Reply |
Click Reply to open a text area in which you can compose a message to send as a response. |
| 6 | Customer Details Panel | Click the arrow to expand the panel. You can view the contact's details on the Info tab and review their interaction history on the History tab. If there is a script, click Script to view and submit the script. |
Sending a Reply
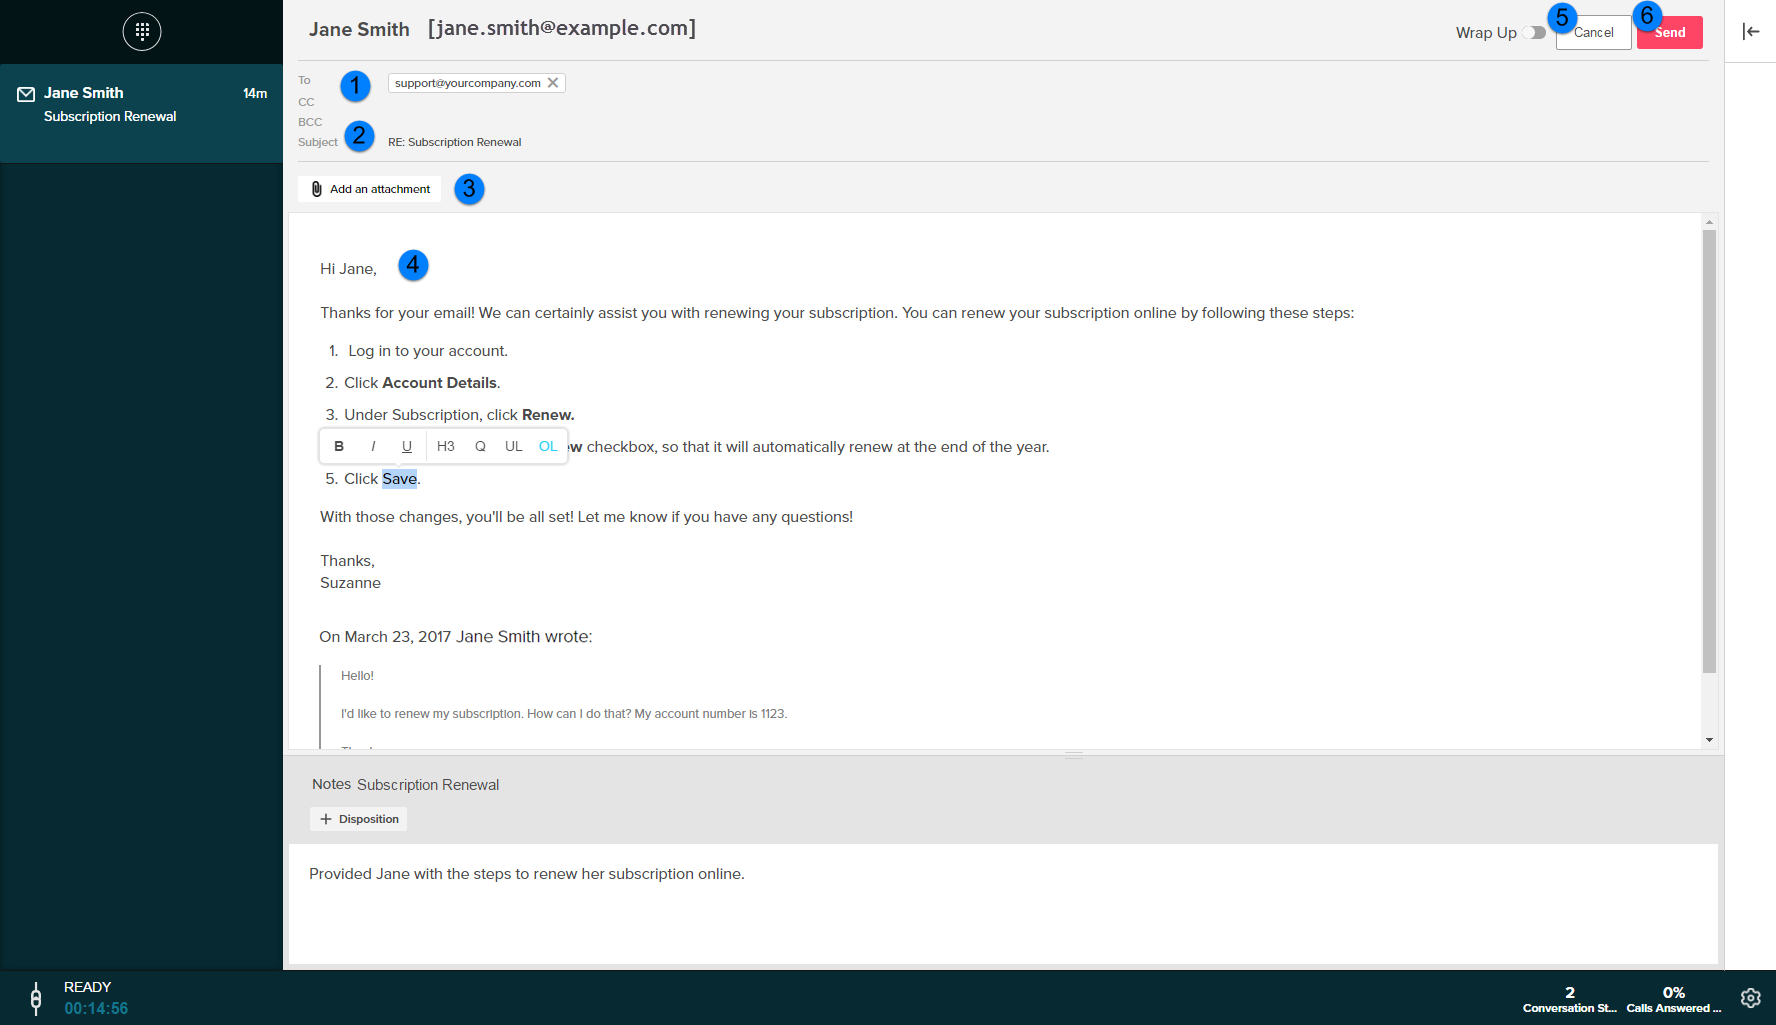
If you click Reply, the email opens to enable you to compose a response:
| Object | Description | |||
|---|---|---|---|---|
| 1 |
Email Addresses |
|
||
| 2 | Subject | The subject or summary of the email. This field can't be edited. | ||
| 3 | Add an attachment |
Click to add a file as an attachment, such as an image or document. You can add multiple attachments. After you add one attachment by clicking Add an Attachment, click the paper clip to add additional files. A window opens in which you can navigate to the file on your computer. Select the file and then click Open to add it to your email.
|
||
| 4 | Compose |
Enter your response to the email. To apply formatting, highlight the text to open an inline formatting toolbar. You can apply the following formatting:
|
||
| 5 | Cancel | Click Cancel to exit the email response you are composing without sending it. The email response pane is closed and the contact's email is shown. You can click Reply to compose a new response or click No Reply to end the interaction. | ||
| 6 | Send | Click Send to send the email to the recipients. The email closes and the interaction ends. |
 )
)