Step 7: Map the Flow to an Assigned Contact Number
Dispatch Mapping directs a call to an active flow. For example, you could map all incoming calls for a tenant to a specific number. That number will trigger a flow which can then do further, more advanced routing to agents with specific skills or to groups of agents.
Go to Flows > Dispatch Mapping to open the Dispatch Mapping Management window. Existing mappings will be listed.
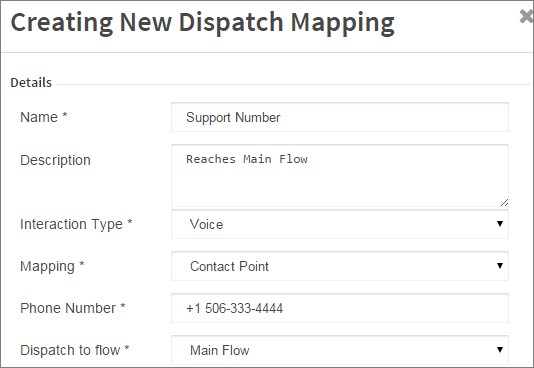
- Click Create in the upper right corner to open the Creating New Dispatch Mapping panel.
- Enter a Name.
This is a free form entry field. Use any Dispatch Mapping Name that doesn't already exist and would apply for your business, such as Support Requests, ABC Inc Main Telephone Number, Reservations Line. - Optionally, enter a brief Description for this mapping.
- Select an Interaction Type of Voice.
- Select a Mapping option of Contact Point
- In the Phone Number field, enter the Twilio telephone number provided to you in an email prior to beginning this session.
Telephone numbers are entered in E.164 format. For example, +15063334444. - In the Dispatch to flow option, select the flow that you created previously from Step 5: Publish Your Flow.

- Click Submit at the bottom of the panel.
When the telephone number used here is dialed, the flow that it is assigned to will be triggered and put into action.
Next Section:
Step 8: Log in to the Agent Toolbar

