Click to Email in Skylight Desktop
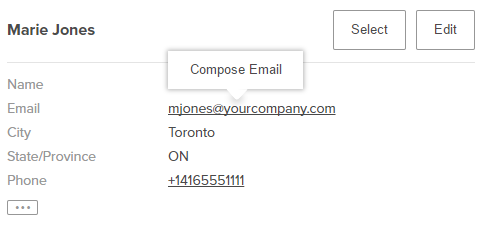
With Click to Email, you can initiate an outbound email by clicking a contact's email address in the customer management panel. Use this method when you want to send an email to a contact and the email isn't a reply to an inbound email from the contact.
To use Click to Email:
- Search for the contact in the customer management panel.
- Click the contact's email address.
- Click Compose Email.
The Compose Email window opens in the primary content panel with the contact's email address in the To field. The contact's email address cannot be removed. Optionally, add additional recipients in the To, CC, or BCC fields.

Note: If you have permission to change the FROM/Reply To address that shows in an email, you will see the option to Select Reply As. If you want to change the email address from which the email is sent, click Select Reply As and choose the email you want to use from the list. If at any time the Reply As address is incorrect, cancel the interaction and re-initiate the email or on the Info panel click the email address, click Select Reply As and then select the correct email address.
- Enter a response in the Compose area. Use the following options to enhance your response:
- To attach a file, click Add an Attachment.
- To format the text, select the text that you want to format. The inline formatting toolbar opens where you can add the following formatting:
- B: Bold
- I: Italics
- U: Underlined
- H3: Level 3 Heading
- Q: | Quote
- UL: Unordered or bulleted list (
 )
) - OL: Ordered or numbered list (1, 2, 3...)
- Optionally, add a disposition code or internal notes for the interaction.
- Click Send.
- If Wrap Up is enabled, complete any required post interaction work such as adding more notes.
Wrap Up ends when you click End Wrap Up or when the maximum wrap up time elapses.

